

Okay, let’s be honest for a second — Brussels sprouts used to have a bad reputation. You probably remember them from your childhood as those weird, bitter green balls that your parents swore were “good for you.”
But times have changed, my friend.
Because once you’ve tried shredded Brussels sprouts, you’ll realize this humble veggie is basically the kale upgrade we deserved. Crispy edges, nutty flavor, and endless versatility — this is the green side dish that turns “ugh” into “OMG.”
So if you’ve got a bag of sprouts sitting in your fridge and zero inspiration, keep reading. We’re about to shred those little guys into something magical.
Table of Contents
Why You’ll Love Shredded Brussels Sprouts
Let me paint you a picture: tender on the inside, crispy on the outside, kissed with olive oil and maybe a squeeze of lemon — that’s shredded Brussels sprouts perfection.
Here’s why this recipe deserves a spot in your weekly lineup:
- Fast: Shred, toss, roast (or sauté) — done in under 20 minutes.
- Healthy: Packed with fiber, vitamin C, and antioxidants.
- Budget-friendly: Cheap and widely available.
- Customizable: Dress them up with bacon, Parmesan, or nuts.
- Tastes amazing: Seriously, this isn’t your grandma’s boiled sprout.
It’s the kind of side dish that can steal the show. You’ve been warned.
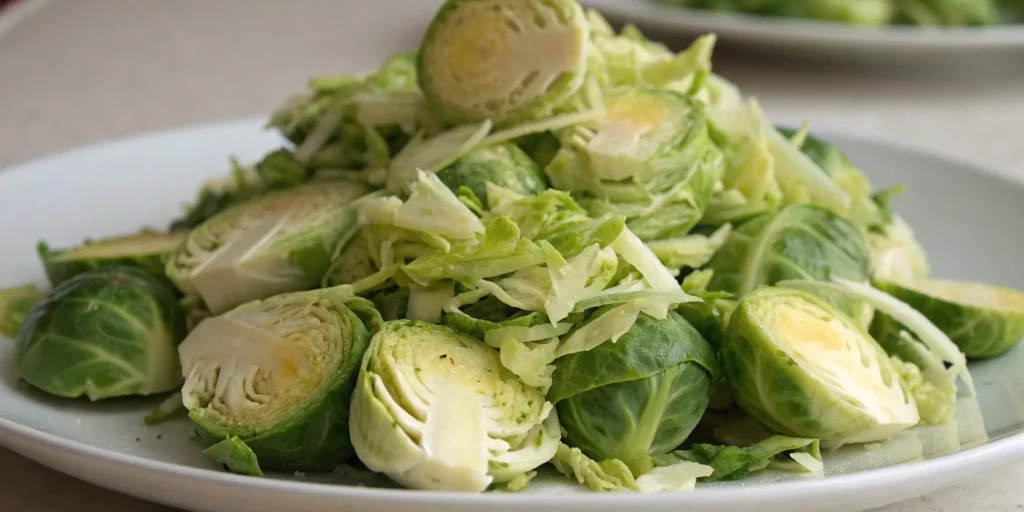
How to Shred Brussels Sprouts Like a Pro

Before we even start cooking, let’s talk shredding.
You’ve got options — and yes, your method matters.
1. The Food Processor Shortcut
If you’ve got a food processor, now’s its time to shine. Use the slicing blade and watch those sprouts turn into ribbons in seconds. Perfect for lazy days (aka, every day).
2. The Mandoline Magic
Want paper-thin perfection? Use a mandoline slicer — just watch your fingers, because those things are sneaky.
3. The Classic Knife Method
No fancy gadgets? No problem. Cut off the ends, slice each sprout in half, then thinly slice crosswise. Takes a bit longer, but hey, free arm workout. 💪
How to Cook Shredded Brussels Sprouts
Alright, shredding’s done — time to bring out the flavor.
You’ve got three killer methods, depending on your mood (and patience level).
1. Roasted Shredded Brussels Sprouts
Crispy, caramelized, and addictively good.
How to:
- Toss shredded sprouts with olive oil, salt, and pepper.
- Spread evenly on a baking sheet (don’t overcrowd — give them room to crisp).
- Roast at 400°F (200°C) for 15–20 minutes, stirring halfway through.
- Finish with lemon juice or balsamic glaze for extra oomph.
2. Sautéed Brussels Sprouts
Quick, simple, and perfect for busy nights.
How to:
- Heat olive oil or butter in a large skillet over medium-high heat.
- Add the sprouts and stir occasionally until golden and tender (about 6–8 minutes).
- Season with salt, pepper, and maybe a pinch of chili flakes if you’re feeling bold.
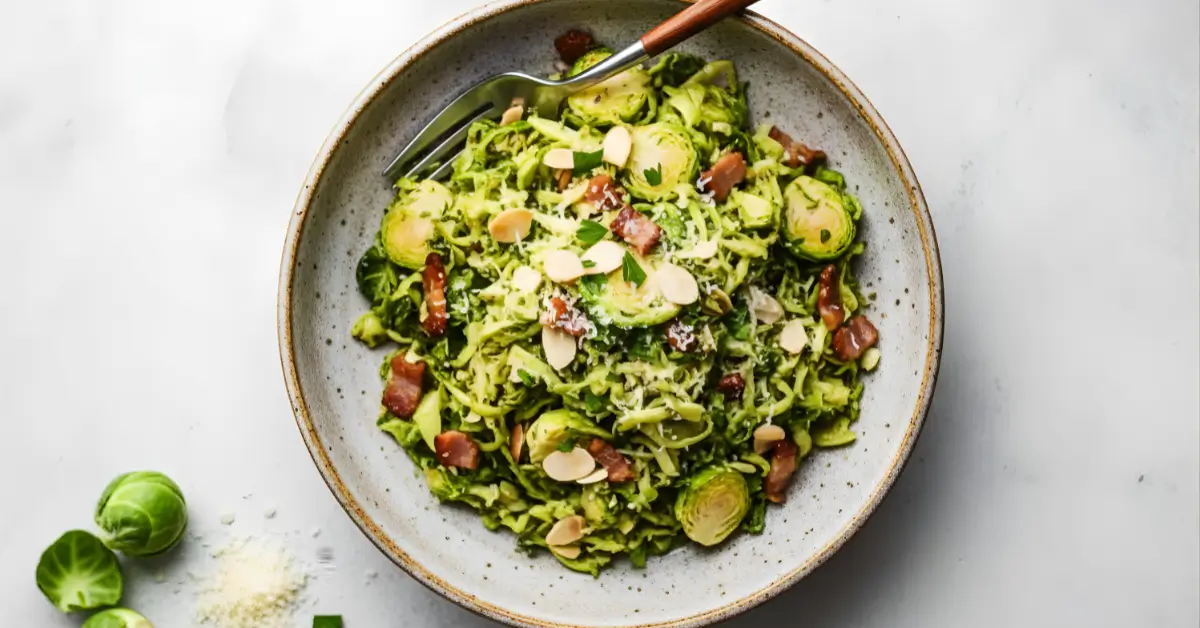
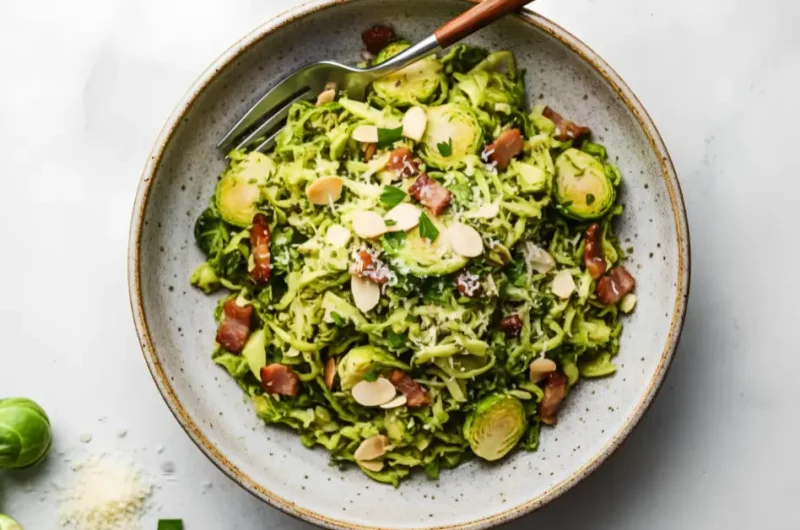
3. Shredded Brussels Sprouts Salad (Raw & Crunchy)
If you want something fresh, this one’s a game changer.
How to:
- Toss raw shredded sprouts with olive oil, lemon juice, Dijon mustard, honey, and salt.
- Add toasted almonds, dried cranberries, and shaved Parmesan.
- Let it sit for 10 minutes to soften slightly — then dig in.
It’s basically coleslaw, but classy.
Shredded Brussels Sprouts: The Crispy, Crunchy Side Dish You Didn’t Know You Needed
Course: Lunch, DinnerCuisine: AmericanDifficulty: Easy4
servings10
minutes15
minutes120
kcalCrispy, flavorful shredded Brussels sprouts — a 20-minute side dish that’s healthy, customizable, and perfect with any meal.
Ingredients
– 1 lb Brussels sprouts, trimmed and shredded
– 2 tbsp olive oil (or butter)
– Salt and black pepper to taste
– 2 garlic cloves, minced (optional)
– 1 tbsp lemon juice or balsamic vinegar
– Optional add-ins: chopped bacon, shaved Parmesan, toasted nuts, or dried cranberries
Directions
- Preheat oven to 400°F (200°C) if roasting, or heat oil in a large skillet if sautéing.
- Trim ends off Brussels sprouts, remove outer leaves, and shred using a food processor or knife.
- Toss shredded sprouts with olive oil, salt, and pepper.
- For roasted: spread evenly on a baking sheet and roast 15–20 minutes, stirring halfway through.
- For sautéed: cook in skillet 6–8 minutes, stirring occasionally until golden and tender.
- Add garlic near the end of cooking for extra flavor, then finish with lemon juice or balsamic drizzle.
- Garnish with cheese, nuts, or cranberries if desired. Serve warm.
Recipe Video
Notes
- Keep heat high enough to crisp but not burn.
- Don’t overcrowd the pan or baking sheet.
- Adjust seasoning and toppings to your taste — Brussels are versatile!
Pro Tips for the Best Results
You know that moment when you pull a tray of Brussels sprouts from the oven and half are soggy while the others look like they’ve survived a forest fire? Yeah… let’s avoid that.
Here’s how to nail shredded Brussels sprouts every single time:
1. Dry Them Like You Mean It
This step is the difference between crispy and sad. After washing, spin or pat those sprouts bone-dry. Any moisture left clings to the pan and turns your would-be crunch into a limp, steamed situation. Treat it like drying your hair — the more effort you put in, the better the results.
2. Don’t Overcrowd the Pan
If your sprouts are packed tighter than rush-hour commuters, they’ll steam instead of roast. Spread them out so each piece gets its moment with the heat. You want those beautiful caramelized edges that make you feel like a pro chef.
3. Season Boldly
Brussels sprouts have personality, and they love bold flavors. Salt, pepper, garlic, lemon juice, chili flakes — don’t be shy. These greens can handle some spice and acidity, and seasoning transforms them from “meh” to “can’t stop eating these.”
4. Use High Heat (and Good Oil)
Whether roasting or sautéing, high heat is your friend. 400°F is the sweet spot — hot enough to crisp without burning. As for oil, olive oil adds depth, but avocado oil can handle higher temps if you’re going for ultra-crispy vibes.
5. Add Texture and Contrast
Want that restaurant-level wow factor? Finish with chopped nuts, pomegranate seeds, or a sprinkle of Parmesan. Texture contrast makes every bite exciting — plus, it just looks prettier on the plate (and on Instagram ).
6. Taste and Adjust Before Serving
Give it one last taste before plating. Sometimes all it needs is a squeeze of lemon, a drizzle of balsamic glaze, or a pinch more salt. Small tweaks = huge payoff.
Flavor Combos That Never Miss
Let’s be honest — plain sprouts can be… fine. But why stop at fine?
Here are some killer flavor pairings to try:
- Honey + Mustard + Almonds — sweet, tangy, and nutty.
- Bacon + Maple Syrup + Black Pepper — salty-sweet heaven.
- Lemon + Garlic + Parmesan — fresh and zesty.
- Soy Sauce + Sesame Oil + Scallions — Asian-inspired twist.
- Cranberries + Pecans + Feta — holiday favorite.
Mix and match depending on your mood (or what’s in your pantry).
What to Serve With Shredded Brussels Sprouts
Ah, the question every cook asks: what do I serve this with?
Good news — shredded Brussels sprouts go with practically everything.
Here are a few winning combos:
- Grilled chicken or salmon: The sprouts’ crisp texture balances juicy protein perfectly.
- Roast beef or steak: That caramelized edge adds a beautiful contrast to rich meat.
- Pasta or risotto: Toss them right in — they’ll blend beautifully with creamy sauces.
- Eggs: Seriously, top your brunch plate with crispy Brussels. Game changer.
- On toast! Add avocado, sprouts, and a fried egg. You’ll feel like you’re at a fancy café.
If you’re curious about how Brussels sprouts stack up nutritionally (spoiler: they’re powerhouses), check out this Healthline article about their benefits.
Storage & Reheating Tips
Let’s be honest — shredded Brussels sprouts are best fresh. That crispy magic fades over time, but if you’ve got leftovers (or if you’re planning ahead), don’t worry — I’ve got the perfect plan.
1. Storing in the Fridge
Once cooled, store your sprouts in an airtight container for up to 3–4 days. Avoid sealing them while they’re still hot; condensation = soggy city. If you made a salad version (raw with dressing), keep the dressing separate until ready to eat — no one likes a wilted salad.
2. Freezing (Only If You Must)
Technically, yes, you can freeze them — but I’ll be real: they won’t stay crispy. When reheated, they turn soft and lose that satisfying crunch. If you absolutely have to freeze them, spread them on a tray to freeze individually before transferring to a bag. That prevents clumping.
3. Reheating for Best Texture
Skip the microwave — it’ll zap all the life out of them. Instead:
- Oven: Reheat at 375°F (190°C) for 8–10 minutes to revive the crisp.
- Skillet: Heat a drizzle of oil in a pan and toss them until warmed and lightly re-caramelized.
- Air Fryer: Game changer. 3–5 minutes at 375°F and they’re back to crispy glory.
Pro Tip: Before serving reheated sprouts, brighten them up with a squeeze of lemon or splash of vinegar. It instantly brings them back to life.
Common Mistakes to Avoid
Even the best cooks mess up sometimes — but these are the classic Brussels blunders to dodge if you want perfection:
1. Overcrowding the Pan
I’ll say it louder for the people in the back: air circulation is everything. When you pile them on, they steam instead of roast, leaving you with soggy, lifeless sprouts. Use two trays if needed — space equals crisp.
2. Skipping the Dry Step
Brussels sprouts hold onto water like it’s their job. If you skip drying, you’re basically guaranteeing a mushy outcome. Use a salad spinner, towel, or even a hairdryer (kidding… kind of).
3. Under seasoning
Brussels sprouts are like blank canvases — forget to season, and you’ll get that classic “bitter veggie” reputation. A good pinch of salt transforms everything. Add garlic or lemon for brightness, or even chili flakes for heat.
4. Overcooking
We’ve all been there — you blink, and suddenly they’re brown instead of golden. Keep an eye on them. Once they start getting those crisp edges, they’re done. Anything past that = burnt bitterness.
5. Skipping the Finishing Touch
Lemon zest, grated Parmesan, or a drizzle of maple syrup at the end can completely elevate your dish. Don’t skip that final flourish — it’s the difference between “nice” and “whoa, what is this recipe?!”
Final Thoughts: A Shredded Revolution
If you’ve ever doubted Brussels sprouts, this recipe is your redemption arc.
Crispy, flavorful, customizable, and fast — they’re proof that the right technique can turn even the most misunderstood veggie into a star.
So grab that bag of sprouts, shred away, and thank yourself later. Because once you taste these, you’ll never go back to boiling again. Promise.