

If you’ve been searching for an authentic how to make bread stuffing balls 1940s recipe, you’ve just found grandma’s secret.
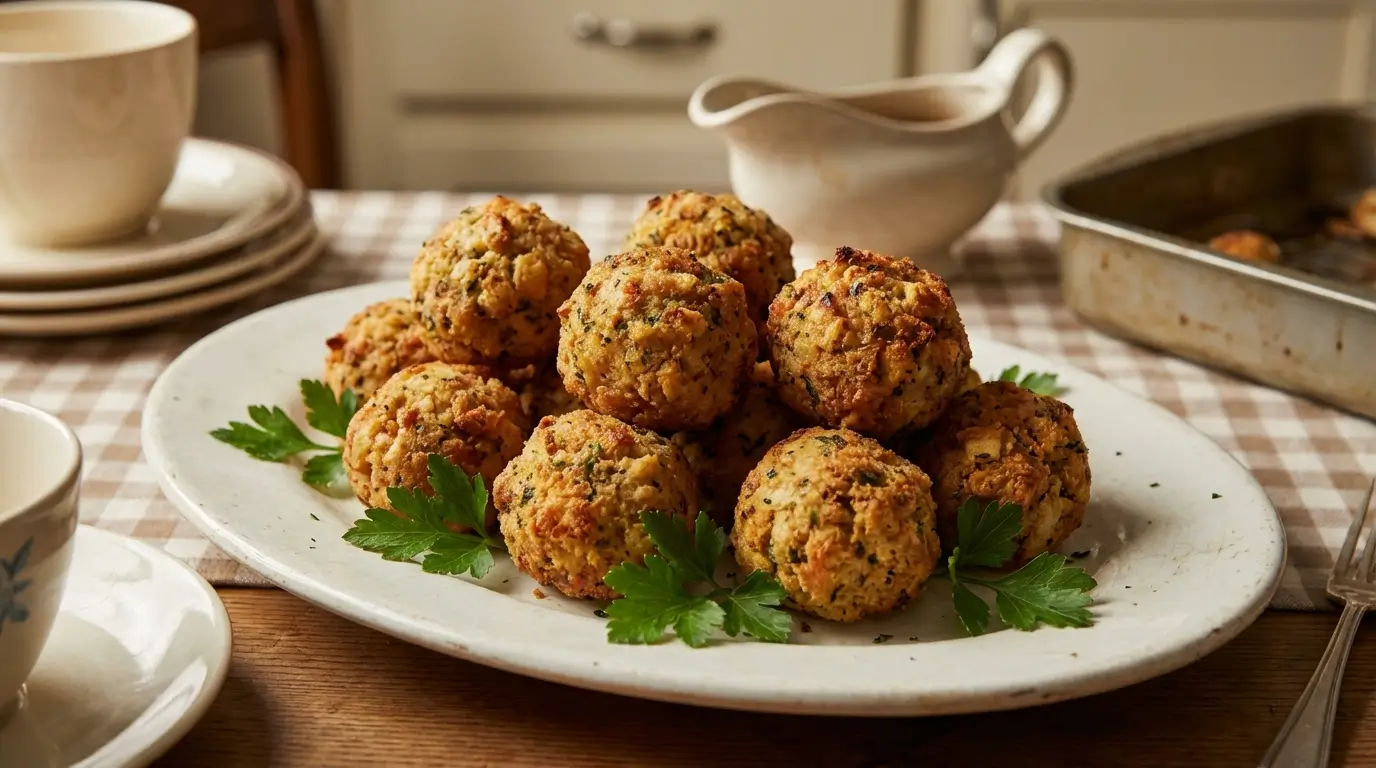
These golden, crispy-on-the-outside, herb-packed-on-the-inside stuffing balls were a staple at every holiday table during the 1940s — and for good reason. They’re simple, economical, and turn leftover bread into something extraordinary.
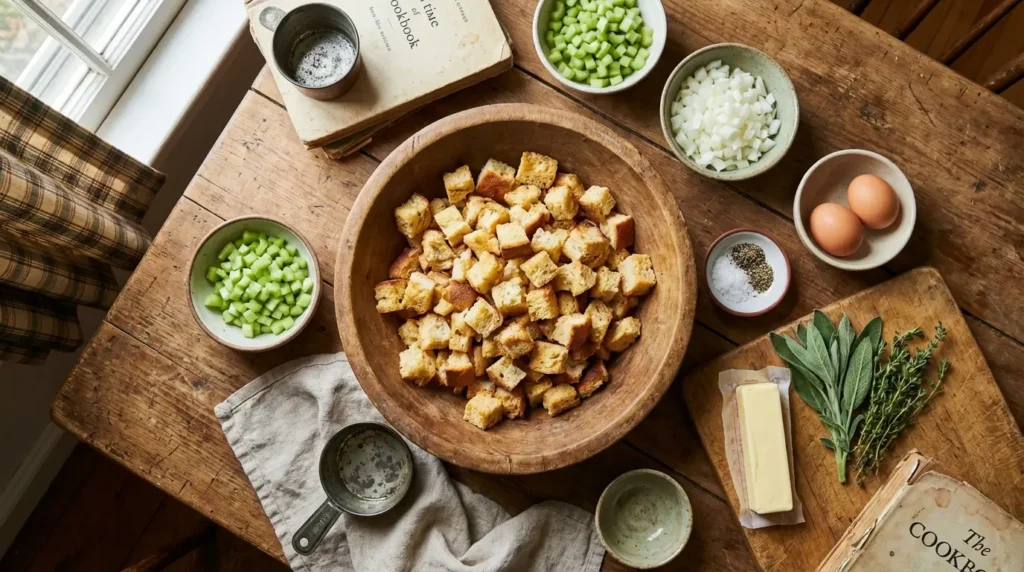
Unlike modern stuffing recipes loaded with fancy ingredients, this 1940s bread stuffing balls recipe uses pantry basics: day-old bread, butter, onions, celery, eggs, and herbs. That’s it. No complicated techniques, no expensive add-ins — just honest, comforting food that tastes like home.
What makes these stuffing balls special? They give you perfectly portioned servings with a crispy exterior that you can’t get from traditional casserole-style stuffing. Plus, they’re easier to serve, store beautifully, and reheat like a dream.
Whether you’re planning Thanksgiving dinner, Christmas lunch, or just craving a nostalgic side dish, this recipe brings back the flavors of wartime home cooking — when every ingredient mattered and nothing went to waste.
Ready to make history delicious? Let’s dive into this timeless bread stuffing balls 1940s recipe that your family will ask for year after year.
Table of Contents
Why This 1940s Bread Stuffing Balls Recipe Will Become Your New Tradition
This isn’t just another stuffing recipe — it’s a piece of culinary history that happens to solve every modern holiday hosting problem.
Individual portions that look impressive. No more scooping messy casserole stuffing — these balls are elegant and easy to serve.
Crispy texture you can’t get from traditional stuffing. The golden exterior gives you that satisfying crunch with every bite.
Uses up stale bread. True to 1940s frugality, this recipe transforms leftover bread into something special.
Make-ahead friendly. Shape them the day before, refrigerate, and bake when ready — perfect for busy holidays.
Feeds a crowd affordably. Basic ingredients stretch far, making this ideal for large family gatherings.
Kid-approved finger food. Little hands love picking up these handheld servings instead of traditional stuffing.
This vintage stuffing balls recipe proves that the best recipes don’t need modern tweaks — they just need to be remembered.
Why Stuffing Balls Became Popular During the 1940s
During World War II, home cooks had to get creative with rationing and limited ingredients. Bread stuffing balls emerged as a clever solution — they used up every scrap of stale bread, required minimal butter and eggs, and could be stretched to feed unexpected guests. The genius? Rolling stuffing into balls created more crispy surface area than traditional casserole-style stuffing, making a little go a long way in terms of flavor and satisfaction. For more insight into how home cooks adapted recipes during wartime rationing, The 1940s Experiment blog offers fascinating historical context and authentic recipes from that era.
The genius? Rolling stuffing into balls created more crispy surface area than traditional casserole-style stuffing, making a little go a long way in terms of flavor and satisfaction.
Grandmothers across America perfected their own versions, passing down recipes through generations. Some families called them “dressing balls,” others “stuffing puffs,” but the concept remained the same: economical, delicious, and festive.
Today, this retro bread stuffing balls recipe is making a comeback as people rediscover the joy of vintage cooking and waste-reducing recipes.

How to Make Bread Stuffing Balls 1940s Recipe – Classic Holiday Side Dish
Course: Sides, DinnerCuisine: American, VintageDifficulty: Easy12
servings15
minutes30
minutes180
kcal45
minutesThis authentic 1940s bread stuffing balls recipe delivers crispy, golden exteriors with savory herb-filled centers. Perfect for Thanksgiving, Christmas, or any holiday gathering.
Ingredients
- For the Stuffing Base:
8 cups day-old bread cubes (about 1 pound loaf)
1 cup celery, finely diced
1 cup yellow onion, finely diced
½ cup unsalted butter
2 cups chicken or turkey broth (warm)
2 large eggs, beaten
2 teaspoons dried sage
1 teaspoon dried thyme
1 teaspoon salt
½ teaspoon black pepper
¼ teaspoon poultry seasoning (optional, for extra flavor)
- For Topping:
2 tablespoons melted butter (for brushing)
Fresh parsley for garnish
Directions
- Preheat oven to 350°F (175°C) and line a baking sheet with parchment paper.
- Prepare the bread. Cut day-old bread into ½-inch cubes and place in a large mixing bowl. If bread is fresh, toast cubes at 300°F for 10 minutes until slightly dried.
- Sauté vegetables. In a large skillet over medium heat, melt butter. Add celery and onion, cook for 5-7 minutes until softened and fragrant.
- Combine ingredients. Pour sautéed vegetables (with butter) over bread cubes. Add sage, thyme, salt, pepper, and poultry seasoning. Toss gently to distribute herbs evenly.
- Add moisture. Pour warm broth over the mixture gradually, stirring gently. Add beaten eggs and mix until everything is moistened but not soggy. The mixture should hold together when squeezed.
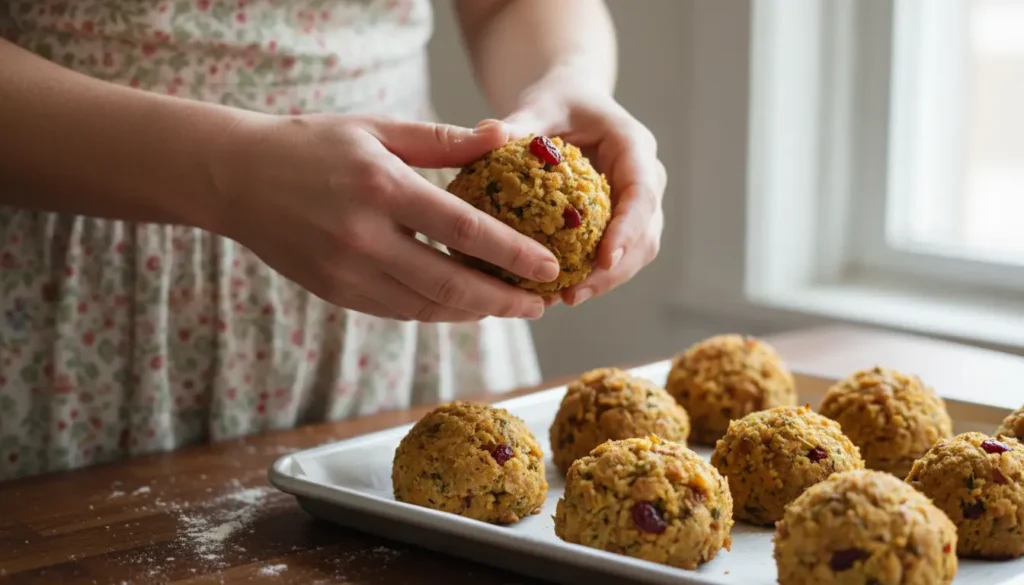
- Form balls. Using your hands or an ice cream scoop, form mixture into 12 equal balls (about ½ cup each). Pack firmly so they hold their shape during baking.
- Arrange and brush. Place stuffing balls on prepared baking sheet, spacing them 2 inches apart. Brush tops with melted butter for extra crispiness.
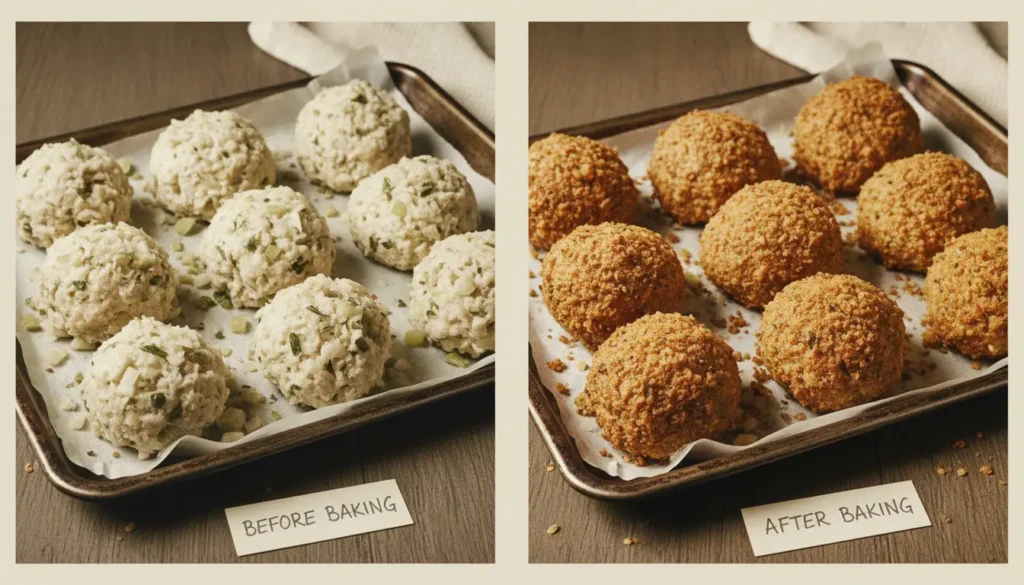
- Bake. Bake for 25-30 minutes until golden brown and crispy on the outside. Internal temperature should reach 165°F.
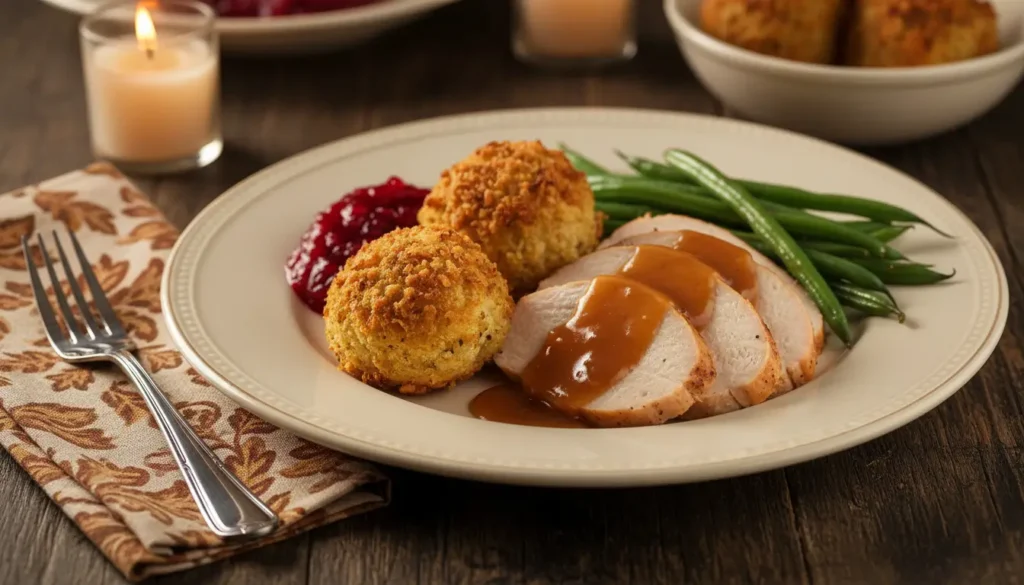
- Serve. Garnish with fresh parsley and serve warm alongside turkey, gravy, or cranberry sauce.
Recipe Video
Notes
- Bread choice: White bread, whole wheat, or sourdough all work. Avoid very soft sandwich bread — it gets too mushy.
- Make-ahead: Form balls, cover, and refrigerate up to 24 hours before baking. Add 5 minutes to baking time if starting from cold.
- Freezing: Freeze unbaked balls on a tray, then transfer to freezer bags. Bake from frozen at 350°F for 40-45 minutes.
- Storage: Refrigerate leftovers in airtight container for 3-4 days. Reheat at 350°F for 10-12 minutes to restore crispiness.
Nutrition Information (per ball)
- Calories: 180 kcal
- Protein: 5g
- Fat: 9g
- Carbohydrates: 20g
- Fiber: 2g
- Sodium: 380mg
The Secret to Crispy, Golden Stuffing Balls Every Time
Even the simplest 1940s recipe for bread stuffing balls requires a few tricks to get that perfect texture.
1. Use Day-Old Bread (Never Fresh)
Fresh bread turns mushy and doesn’t absorb moisture properly. Day-old or slightly stale bread cubes hold their shape better and create the ideal texture. Leave bread out overnight or toast lightly in the oven.
2. Don’t Over-Soak the Bread
The mixture should be moist enough to hold together when squeezed, but not dripping wet. Add broth gradually — you may not need all of it depending on your bread’s dryness.
3. Pack the Balls Firmly
Loose stuffing balls fall apart during baking. Use firm pressure when shaping, similar to forming meatballs. An ice cream scoop helps create uniform sizes.
4. Brush with Butter Before Baking
This 1940s trick creates that signature golden, crispy crust. Don’t skip it — the butter browns beautifully and adds rich flavor.
5. Give Them Space on the Baking Sheet
Crowding prevents even browning. Leave at least 2 inches between each ball so hot air circulates properly.
6. Let Them Rest Before Serving
Allow stuffing balls to cool for 5 minutes after baking. This lets them firm up slightly, making them easier to transfer and preventing burns.
How to Make This Recipe Your Own
While the original 1940s stuffing balls are perfect as-is, modern cooks can adapt them to dietary needs and flavor preferences.
Sausage Stuffing Balls
Brown ½ pound ground beef sausage with the onions and celery for a heartier version. This adds protein and rich, savory depth.
Herb-Lover’s Version
Double the sage and thyme, or add fresh rosemary and parsley. Fresh herbs give brighter flavor than dried.
Cranberry-Pecan Stuffing Balls
Fold in ½ cup dried cranberries and ¼ cup toasted chopped pecans for a sweet-savory twist. Perfect for Thanksgiving tables.
Gluten-Free Adaptation
Use gluten-free bread cubes and verify your broth is gluten-free. The texture works beautifully with modern gluten-free breads.
Vegetarian/Vegan Option
Replace butter with olive oil or vegan butter, use vegetable broth, and substitute flax eggs (2 tablespoons ground flaxseed + 6 tablespoons water).
Mushroom & Thyme Stuffing Balls
Sauté 1 cup chopped mushrooms with the vegetables for earthy, umami flavor. Cremini or shiitake work best.
Perfect Pairings for Your 1940s Stuffing Balls
These versatile bread stuffing balls complement virtually any holiday main dish.
Roasted turkey or chicken — The classic pairing that never fails. Serve with plenty of gravy for dipping. If you’re looking for flavorful poultry options, try our honey garlic ground turkey recipe for a sweet-savory twist, or explore our collection of juicy chicken thigh recipes for more dinner inspiration.
Glazed Beef — The savory herbs balance the sweet, salty beef perfectly.
Pot roast — Turn this into a comforting Sunday dinner with tender beef and root vegetables. For another hearty beef option, our cheesy ground beef pasta casserole makes an excellent companion dish for family gatherings.
Cranberry sauce — A dollop of tart cranberry sauce cuts through the rich, buttery stuffing beautifully.
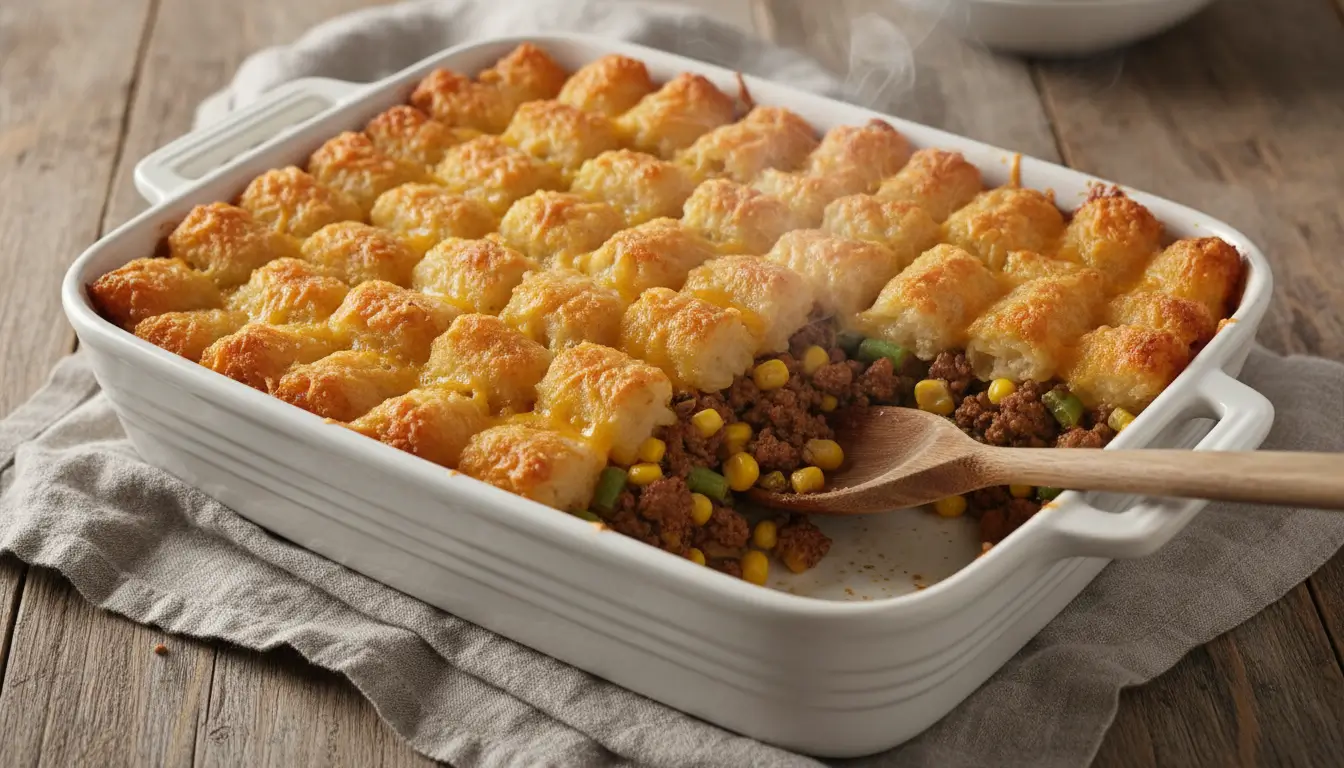
Green bean casserole — Another 1940s classic that pairs perfectly with vintage stuffing balls.
Mashed potatoes and gravy — Double-carb heaven that feels like a warm hug.
Roasted root vegetables — Carrots, parsnips, and Brussels sprouts add color and nutrition to your plate.
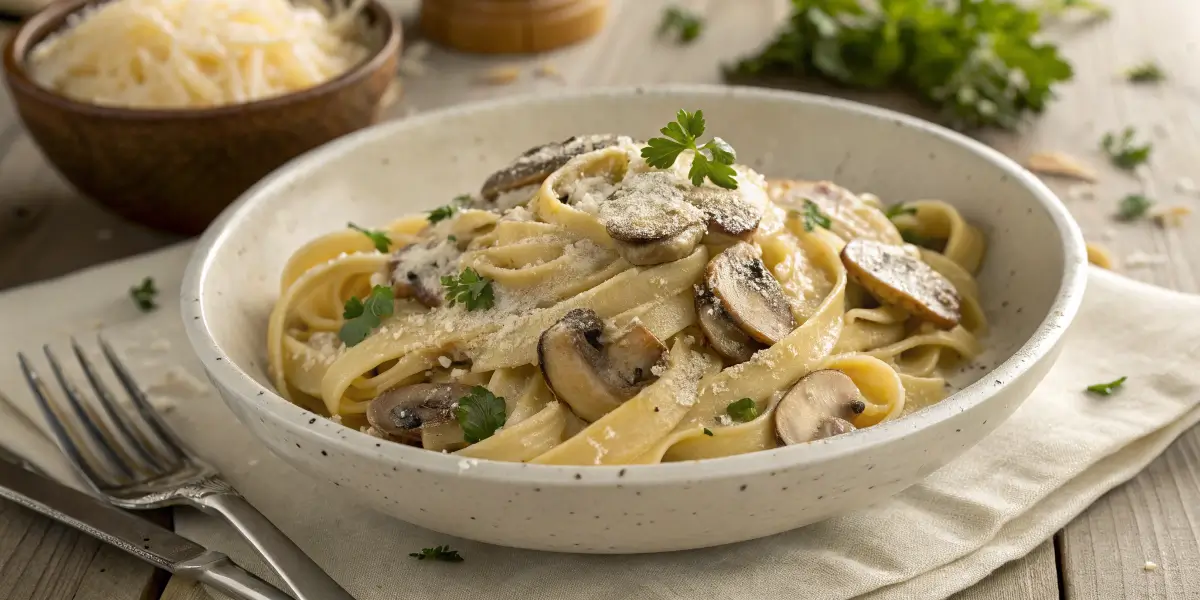
For more comforting side dishes to round out your holiday table, consider serving alongside our creamy mushroom pasta or the viral baked feta pasta with cherry tomatoes — both deliver crowd-pleasing flavors that complement these retro stuffing balls perfectly.
How to Prep Stuffing Balls in Advance
One of the best features of this 1940s bread stuffing balls recipe is how well it adapts to busy holiday schedules.
24 Hours Before
Shape the stuffing balls, place on a baking sheet, cover tightly with plastic wrap, and refrigerate. Bake directly from the fridge, adding 5 extra minutes to cooking time.
1 Week Before
Freeze unbaked stuffing balls on a parchment-lined tray until solid (about 2 hours), then transfer to freezer bags. Label with date and baking instructions. Bake from frozen at 350°F for 40-45 minutes.
Day-Of Timeline
Make the stuffing mixture 2-3 hours ahead, keep covered at room temperature, then form and bake right before serving for maximum freshness.
Reheating Leftovers
Arrange refrigerated stuffing balls on a baking sheet and reheat at 350°F for 10-12 minutes until heated through and crispy. Avoid microwaving — it makes them soggy.
Storage Guidelines
Refrigerate in an airtight container for 3-4 days. Freeze baked stuffing balls for up to 3 months. Thaw overnight in refrigerator before reheating.
Frequently Asked Questions
Can I use fresh bread instead of day-old bread?
Fresh bread doesn’t work as well because it’s too soft and becomes mushy. If you only have fresh bread, cut it into cubes and toast in a 300°F oven for 8-10 minutes until slightly dried out.
Why are my stuffing balls falling apart?
This usually means the mixture is too dry or wasn’t packed firmly enough. Add a bit more broth (2-3 tablespoons at a time) until the mixture holds together when squeezed. Pack balls tightly with firm pressure.
Can I make stuffing balls without eggs?
Yes! For egg-free stuffing balls, increase the broth slightly and pack the balls extra firmly. The moisture from broth and butter helps bind the ingredients. You can also use flax eggs (1 tablespoon ground flaxseed + 3 tablespoons water per egg).
What’s the difference between stuffing balls and dressing balls?
Traditionally, “stuffing” is cooked inside the turkey cavity, while “dressing” is baked separately. These balls are technically dressing, but the terms are often used interchangeably. The 1940s recipes called them both names.
How do I know when stuffing balls are done?
They should be golden brown and crispy on the outside, with an internal temperature of 165°F. Insert a thermometer into the center of the largest ball to check doneness.
Can I add sausage or bacon to this recipe?
Absolutely! Brown ½-1 pound of ground sausage or crumbled bacon with the onions and celery. This adds protein and rich flavor that many families love.
Do stuffing balls need to be refrigerated?
Yes, once cooled, stuffing balls should be refrigerated within 2 hours. They contain eggs and broth, which are perishable ingredients.
The Simple Science Behind Perfect Stuffing Balls
This authentic 1940s stuffing balls recipe works because it balances three key elements: structure, moisture, and fat.
Day-old bread provides structure — the slightly dried cubes absorb liquid without dissolving, creating a firm yet tender interior.
Eggs act as the binder — they coagulate during baking, holding everything together while adding richness.
Butter adds flavor and crispiness — it coats the bread cubes and browns beautifully in the oven, creating that signature golden crust everyone loves.
Warm broth activates the starches — using warm (not cold) broth helps the bread absorb moisture evenly without creating soggy spots.
The genius of this 1940s approach? It’s forgiving, economical, and produces consistent results with basic ingredients. No fancy equipment, no complicated techniques — just honest cooking that delivers every time.
Bring Back a Classic This Holiday Season
There’s something magical about serving a dish that your grandmother’s grandmother might have made. This how to make bread stuffing balls 1940s recipe connects us to a simpler time when home cooks made extraordinary meals from humble ingredients.
Whether you’re hosting Thanksgiving dinner, planning a Christmas feast, or simply craving comfort food with history, these golden, crispy stuffing balls deliver nostalgia and flavor in every bite.
The best part? You don’t need to be an experienced cook to nail this recipe. If our grandmothers could make these during wartime rationing, we can certainly make them in our modern kitchens with ease.
So grab that stale bread, heat up the oven, and make some edible history. Your family will thank you — and they might just start a new tradition.
Have you tried vintage recipes like this? Leave a comment below and rate this recipe! I’d love to hear your 1940s cooking stories and family stuffing traditions.